How to Identify Stamps by Photo: A Professional Workflow
Photo identification is the fastest way to triage unknown stamps, but speed only helps when accuracy is controlled. This guide shows a collector-grade process that combines AI suggestions with manual verification so you can avoid expensive misidentifications.
Faster Workflow
Try this in the app now.
Run a quick photo scan first, then validate issue details with the checklist in this guide.
AI-powered matching, fast scan, and free install.
Visual Workflow
Use one sharp reference image before any AI-assisted match claims.
This hero frame mirrors the quality standard used throughout this guide: clean crop, visible perforations, readable details, and traceable source context.

Image: Magnifying glass and stamp tong. Public domain, via Wikimedia Commons.
1) Capture images that preserve detail
To identify a stamp by photo reliably, capture at least three sharp, evenly lit images, one full-frame front, one front close-up, and one of the reverse, on a neutral matte background. Most misreads happen before analysis starts: if light is uneven, corners are cropped, or cancellation marks are blurred, both AI and manual review degrade immediately.
Capture standard (front and back)
- Use indirect daylight or a soft diffused LED source to avoid glare.
- Place the stamp on a neutral, matte background (gray works best).
- Shoot one full-frame image, then 2 close-ups: portrait center and lower corners.
- Photograph the reverse for hinges, gum disturbance, repairs, and paper tone.
- Keep camera parallel to the stamp plane to reduce distortion.
- All four perforation edges visible
- Text legible at 200% zoom
- Cancellation marks readable where present
- No clipped corners, no blown highlights
2) Treat AI output as candidate matching, not final truth
AI photo output should be treated as candidate matches, not a final identification: use it to shortlist likely issues, then confirm each against objective markers such as inscription, denomination, perforation, and watermark. This keeps confidence high and prevents catalog mismatches between visually similar designs.
| Verification field | What to confirm | Why it matters |
|---|---|---|
| Country / inscription | Language, monarch name, postal text | Filters incorrect region and era candidates |
| Face value + currency | Denomination format and symbol | Separates nearly identical reprints |
| Perforation pattern | Gauge differences by side | Often determines catalog subtype |
| Watermark / paper | Pattern, orientation, paper tone | Can multiply or collapse value |
| Postmark date and town | Date legibility and cancellation type | Useful for issue period confirmation |
3) Use confidence scoring to decide next action
Confidence scoring decides your next action: rate an identification high when 4 or more markers align, medium when 2-3 align but a critical one is missing, and low when only the AI guess exists with no hard confirmation. Ranking certainty this way prevents overconfidence when evidence is partial.
Simple confidence model
- High confidence: 4+ markers align (text, denomination, perforation, watermark).
- Medium confidence: 2-3 markers align but one critical marker is missing.
- Low confidence: AI guess only, no hard marker confirmation.
Only run valuation estimates when confidence is medium or high. For low-confidence items, repeat imaging or consult specialty catalogs.
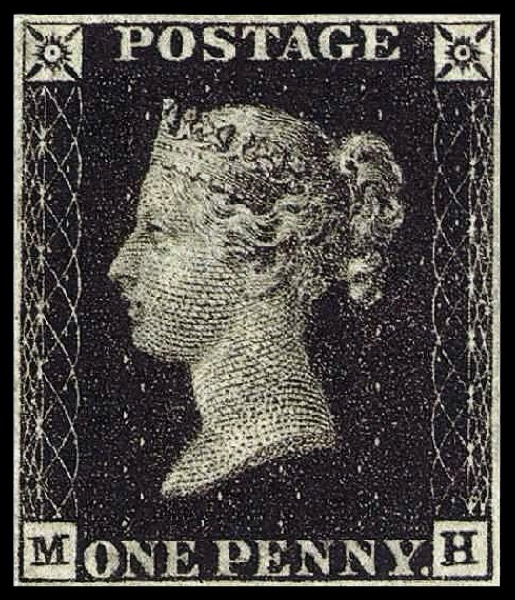
Penny Black, General Post Office of the UK. Public domain, via Wikimedia Commons.
4) Common failure modes and fixes
The most common failure modes when identifying stamps by photo are using only front-side images, trusting asking prices as market value, and skipping watermark or perforation checks, each of which can be fixed with one extra step. Address them in this order before trusting any match.
Mistake: using only front-side photos
Fix: Always include back-side image for gum and repair evidence.
Mistake: trusting asking prices as market value
Fix: Compare sold listings and auction realizations. Use asking prices only as a weak upper bound.
Mistake: skipping watermark/perforation checks
Fix: For ambiguous designs, do technical checks before claiming rarity.
Next step after identification
The next step after identification is structured valuation: once your ID is validated, move directly into pricing using sold-listing data rather than asking prices.
- Stamp Value Checker Guide for low-mid-high pricing ranges.
- Rare Stamps Worth Money to understand true scarcity signals.
- How to Identify Old Stamps if the issue is pre-20th century or uncertain era.
- How Much Is My Stamp Worth? for a complete valuation walkthrough.
Try this in the app now.
Use StampID to scan your next stamp and apply this verification flow with cleaner starting data.
Free install for fast first-pass identification.
Editorial note: This guide is educational and not a substitute for expert certification on high-value candidates.
Frequently Asked Questions
Can you identify a stamp just from a photo?
Yes, you can identify most stamps from a photo, but accuracy depends on image quality. Capture at least three sharp, evenly lit shots, a full-frame front, a close-up of the design, and the reverse, then confirm the AI suggestion against objective markers like inscription, denomination, perforation, and watermark. A clear photo lets you reach a high-confidence match; a blurry or cropped one degrades both AI and manual review.
What is the best app to identify a stamp by photo?
StampID is a free app that identifies stamps from a photo using AI matching and then helps you verify the result against the same markers experts use. It scans the front and back, suggests likely catalog issues, and links into a valuation workflow so you can move from identification straight to checking what the stamp is worth.
Why do I need a photo of the back of the stamp?
The back of a stamp reveals gum condition, hinge marks, thins, and repairs that the front cannot show, and these factors heavily affect both identification and value. Using only front-side photos is the most common failure mode, so always include a reverse image to capture paper tone and gum disturbance before claiming a match or estimating price.
How accurate is AI stamp identification?
AI stamp identification is accurate enough to shortlist likely issues but should be treated as a candidate match, not final truth. Rate the result high confidence when 4 or more markers align, medium when 2-3 align with one critical marker missing, and low when only the AI guess exists. Run a valuation only on medium- or high-confidence matches, and re-image or consult specialty catalogs for low-confidence items.
Can a photo tell me if my stamp is rare or valuable?
A photo can suggest rarity but cannot confirm value on its own, because scarcity often hinges on watermark, perforation gauge, and paper type that need close inspection. Confirm those technical details first, then compare sold listings rather than asking prices. See Rare Stamps Worth Money for scarcity signals and How Much Is My Stamp Worth? for a full valuation walkthrough.